Abstract
Asterisk is an open-source PBX (Private Branch Exchange) software that can be used to build a VoIP system. In this post, we will walk through the process of building Asterisk from sources and installing it on an Amazon EC2 instance.
After following the setup process in future post we will go through SIP trunk configuration - we will use AWS Chime as a SIP Trunkprovider, configure it for outgoing toll-free numbers and deep dive into service details.
Asterisk installation
Asterisk is the core component that has multiple integrations with PSTN, SIP, VoIP, CRM, REST and automations. Asterisk as SIP server is fully manageable and operable from CLI, but there are multiple GUI-based extension that using Apache http server provide browser-based UI for configuration. One of the most popular is FreePBX. There are multiple version of each product but not of them are compatible.
In this install we will use these compatible versions:
| Asterisk | FreePBX |
|---|
| 20.6.0 | 16.0 |
1. Prepare installation directory
1
2
| mkdir -p /usr/src/asterisk
cd /usr/src/asterisk
|
Since we will make Asterisk full setup from sources and build on the machine from the scratch - we will need compiler, libraries and development tools:
1
| apt-get install unzip git sox gnupg2 curl libnewt-dev libssl-dev libncurses5-dev subversion libsqlite3-dev build-essential libjansson-dev libxml2-dev libedit-dev uuid-dev subversion -y
|
3. Asterisk installation
1
2
3
4
5
6
7
8
9
10
11
12
13
14
15
16
17
18
19
20
21
22
23
24
25
26
27
28
29
30
31
32
33
34
35
36
37
| wget http://downloads.asterisk.org/pub/telephony/asterisk/asterisk-20-current.tar.gz
tar -xvzf asterisk-20-current.tar.gz
cd asterisk-20.6.0/
contrib/scripts/get_mp3_source.sh
contrib/scripts/install_prereq install
./configure
configure: Menuselect build configuration successfully completed
.$$$$$$$$$$$$$$$=..
.$7$7.. .7$$7:.
.$$:. ,$7.7
.$7. 7$$$$ .$$77
..$$. $$$$$ .$$$7
..7$ .?. $$$$$ .?. 7$$$.
$.$. .$$$7. $$$$7 .7$$$. .$$$.
.777. .$$$$$$77$$$77$$$$$7. $$$,
$$$~ .7$$$$$$$$$$$$$7. .$$$.
.$$7 .7$$$$$$$7: ?$$$.
$$$ ?7$$$$$$$$$$I .$$$7
$$$ .7$$$$$$$$$$$$$$$$ :$$$.
$$$ $$$$$$7$$$$$$$$$$$$ .$$$.
$$$ $$$ 7$$$7 .$$$ .$$$.
$$$$ $$$$7 .$$$.
7$$$7 7$$$$ 7$$$
$$$$$ $$$
$$$$7. $$ (TM)
$$$$$$$. .7$$$$$$ $$
$$$$$$$$$$$$7$$$$$$$$$.$$$$$$
$$$$$$$$$$$$$$$$.
configure: Package configured for:
configure: OS type : linux-gnu
configure: Host CPU : x86_64
configure: build-cpu:vendor:os: x86_64 : pc : linux-gnu :
configure: host-cpu:vendor:os: x86_64 : pc : linux-gnu :
|
Choose packages that are needed for setup:
To parallelized build and compilation, first let’s check amount of cpu cores available on machine and based on this factor scale the process:
1
2
3
4
5
6
7
8
9
10
11
| nproc
make -j4
+--------- Asterisk Build Complete ---------+
+ Asterisk has successfully been built, and +
+ can be installed by running: +
+ +
+ make install +
+-------------------------------------------+
root@aster-18-freepbx-16:/usr/src/asterisk/asteris
make install
|
4. Set permissions for asterisk
1
2
3
4
5
6
7
| groupadd asterisk
useradd -r -d /var/lib/asterisk -g asterisk asterisk
usermod -aG audio,dialout asterisk
chown -R asterisk:asterisk /etc/asterisk
chown -R asterisk:asterisk /var/{lib,log,spool}/asterisk
chown -R asterisk:asterisk /usr/lib/asterisk
|
1
| nano /etc/default/asterisk
|
1
2
| AST_USER="asterisk"
AST_GROUP="asterisk"
|
1
| nano /etc/asterisk/asterisk.conf
|
1
2
| runuser = asterisk ; The user to run as.
rungroup = asterisk ; The group to run as.
|
1
2
3
| systemctl restart asterisk
systemctl enable asterisk
systemctl status asterisk
|
1
2
3
4
5
6
7
8
9
10
11
12
13
14
| # asterisk -rvv
Asterisk 20.6.0, Copyright (C) 1999 - 2022, Sangoma Technologies Corporation and others.
Created by Mark Spencer <markster@digium.com>
Asterisk comes with ABSOLUTELY NO WARRANTY; type 'core show warranty' for details.
This is free software, with components licensed under the GNU General Public
License version 2 and other licenses; you are welcome to redistribute it under
certain conditions. Type 'core show license' for details.
=========================================================================
Running as user 'asterisk'
Running under group 'asterisk'
Connected to Asterisk 20.6.0 currently running on aster-18-freepbx-16 (pid = 43365)
Unable to read or write history file '/root/.asterisk_history'
aster-18-freepbx-16*CLI>
|
FreePBX installation
SIP Asterisk is managed from CLI but there are additional extension that provide gui, FreePbx is among them.
1. Prerequisites for installation
1
2
3
4
5
6
7
8
9
10
| apt install software-properties-common
add-apt-repository ppa:ondrej/php -y
Err:4 https://ppa.launchpadcontent.net/ondrej/php/ubuntu lunar Release
404 Not Found [IP: 185.125.190.80 443]
Hit:5 http://archive.ubuntu.com/ubuntu lunar-security InRelease
Reading package lists... Done
E: The repository 'https://ppa.launchpadcontent.net/ondrej/php/ubuntu lunar Release' does not have a Release file.
N: Updating from such a repository can't be done securely, and is therefore disabled by default.
N: See apt-secure(8) manpage for repository creation and user configuration details.
|
2. Life-hack to install PHP on Ubuntu (lunar-version)
To solve this issue manually edit file:
1
| nano /etc/apt/sources.list.d/ondrej-ubuntu-php-lunar.list
|
change to jammy main:
1
| deb https://ppa.launchpadcontent.net/ondrej/php/ubuntu/ jammy main
|
create file:
1
| nano /etc/apt/preferences.d/ondrejphp
|
1
2
3
| Package: libgd3
Pin: release n=lunar
Pin-Priority: 900
|
3. MariaDB, Apache and PHP7.4 installation
1
| apt install apache2 mariadb-server libapache2-mod-php7.4 php7.4 php-pear php7.4-cgi php7.4-common php7.4-curl php7.4-mbstring php7.4-gd php7.4-mysql php7.4-bcmath php7.4-zip php7.4-xml php7.4-imap php7.4-json php7.4-snmp
|
1
2
3
4
5
6
| wget http://mirror.freepbx.org/modules/packages/freepbx/freepbx-16.0-latest.tgz
tar -xvzf freepbx-16.0-latest.tgz
cd freepbx
apt-get install nodejs npm -y
./install -n
fwconsole ma install pm2
|
4. Patch Apache and PHP
1
2
3
4
| sed -i 's/^\(User\|Group\).*/\1 asterisk/' /etc/apache2/apache2.conf
sed -i 's/AllowOverride None/AllowOverride All/' /etc/apache2/apache2.conf
sed -i 's/\(^upload_max_filesize = \).*/\120M/' /etc/php/7.4/apache2/php.ini
sed -i 's/\(^upload_max_filesize = \).*/\120M/' /etc/php/7.4/cli/php.ini
|
1
2
| a2enmod rewrite
systemctl restart apache2
|
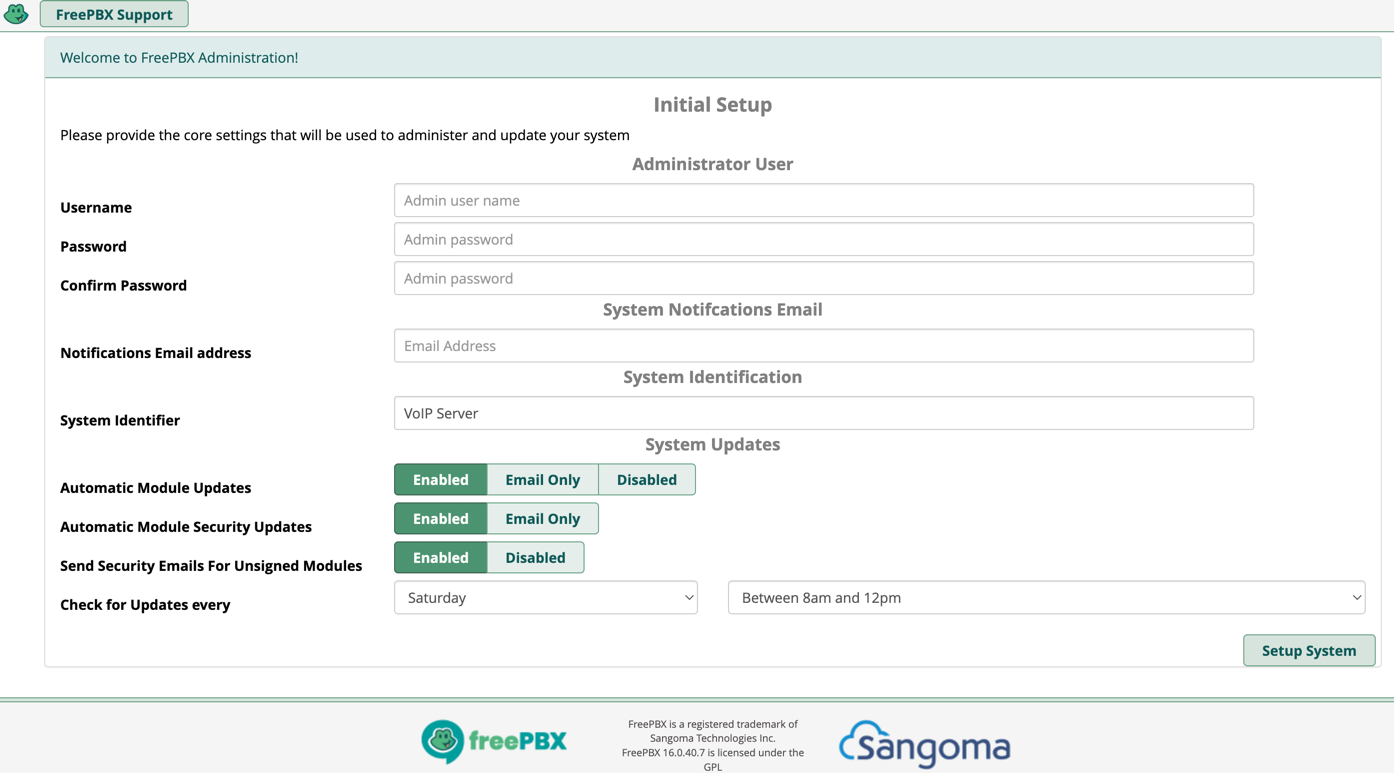
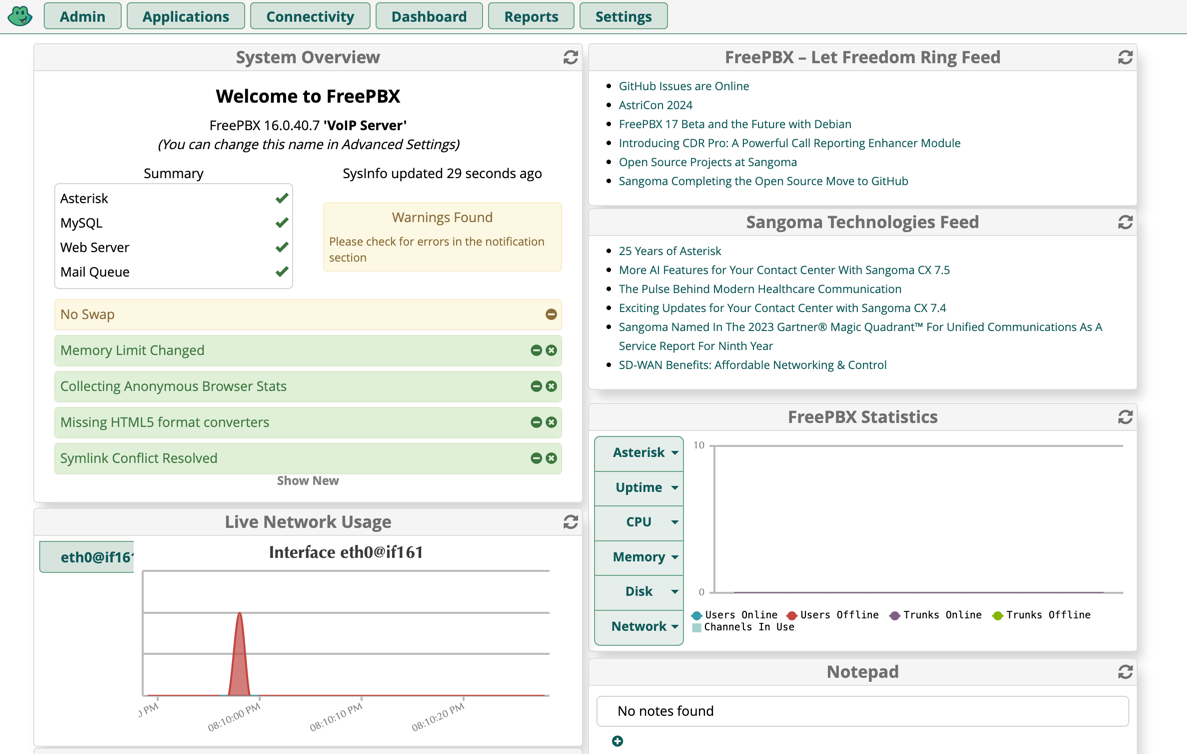
Access to UI
After installation process is finished, check elastic IP address and connect to Asterisk using following URL:
http://{public_elastic_IP}/admin/config.php
EC2 instance Security Groups setup
Following ports should be included into security groups. For more granular control include your public IP address to allow connections only.
| Protocol Higher level | Protocol | Port |
|---|
| HTTPS | TCP | 8089 |
| UDP | UDP | 5060 |
VoIP in the Air
Once Security Groups are configured, you can connect your PBX SIP-based devices or a smartphones that have SIP enabled to public endpoint and start using the VoIP telephony.
Further steps
In the next post we will provision SIP trunk to Asterisk using AWS Chime service and deep dive into its configuration.
References (Links)